CCleaner is generally regarded amongst the best cleaners and system optimization tools for Macs and PCs. Nevertheless, there could be circumstances when it needs to be removed from the computer without a trace. And it’s not that easy as it sounds because often built-in uninstaller utilities just won’t uninstall CCleaner the way it should be done – that is, without any trace.
Is CCleaner a Malware?
This question still can often be met on various forum boards and question-and-answer websites. You can rest assured it is not malware. Neither it is a virus or some other kind of dangerous program. Such questions may arise because it’s not an uncommon thing when people have different kinds of issues when removing CCleaner. Though there are situations where you may want to uninstall the program to fix issues like crashes, incompatibility with other software or simply because you no longer need it. Regardless of why you may want to remove an app, it’s important to note that it does leave behind residual files and folders. In this post, we will illustrate the best methods to remove CCleaner to ensure it leaves behind no traces of it on your Mac.

Getting Rid of CCleaner: How to Manually Remove Mac Cleaner?
The vast majority of Mac OS X applications come bundled with just about everything users will need to run or tune up the application. Mac users can also just as easily drag and drop an unwanted app into the Trash to execute the removal process. But you won’t get rid of CCleaner as easily as other apps at times. Also, the app leaves behind a lot of debris when using this manual method. Therefore, to completely remove CCleaner, it’s important that you follow the step-by-step removal instructions below.
Using the Activity Monitor to Terminate the Process
CCleaner won’t uninstall if its associated process is not removed. If you find that it’s frozen, press ‘Cmd +Opt + Esc’ then select the CCleaner process and click on ‘Force Quit.’
Open up the Activity Monitor located in the ‘Utilities’ folder in your Launchpad and choose ‘All Processes’ in the drop down menu. Then select all the processes associated with CCleaner from the list and hit ‘Quit Process’ towards the left of your screen and then click on ‘Quit’ when the pop-up appears. If this does not work, then use ‘Force Quit.’
Use the Trash to remove CCleaner
You need to log in to an administrator account, or you will need to provide a password when executing the removal process. Use ‘Finder’ to open the ‘Applications’ folder, and search for ‘CCleaner.’ Then drag and drop into the ‘Trash’ – it should start the removal process. You can also click on the program’s icon/folder and remove that too by pressing ‘CMD + Del,’ or click ‘File,’ and then ‘Move to Trash.’

Removing all associated components of CCleaner
Even though CCleaner may have been moved to Trash, many of the files, caches, logs, etc. are still lingering on your computer. To ensure a complete removal, you have to delete all the components manually. Use ‘Spotlight’ to search for them. CCleaner’s files can also be found in the ‘Preferences’ folder in the user’s library folder, i.e., ~/Library/Preferences. Then, go to the system-wide library in the system volume’s root. All the support files can be found in /Library/Application Support/; also, check out ~/Library/Application Support/.
Then open ‘Finder,’ click on the Menu Bar and then “Go,” choose ‘Go to Folder’ and enter the location of the folder: ~/Library. You should also be able to search for all the files and folders that bear the CCleaner’s name or the name of the developer (Piriform) within ~/Library/Caches/, ~/Library/Preferences/, and ~/Library/Application Support/. Just right click on all of the items and choose ‘Move to Trash.’
You should also search a couple of more locations to delete other items like:
- /Library/Caches/;
- /Library/Application Support/;
- /Library/Preferences/.
Now we acknowledge that CCleaner may also leave behind hidden files and kernel extensions, which are not as easy to locate. Though, a Google search can help you in this regard. Most kernel extensions can be found in /System/Library/Extensions with a .kext extension, with the hidden files in the home folder. Use ‘Terminal‘ to list all the contents of a directory and then delete ones associated with CCleaner.
Finally, empty your trash
The final step is to clear your ‘Trash’, which will completely remove the app. Just right click on the ‘Trash’ icon and click ‘Empty Trash.’ It’s important to note that this step cannot be undone.
Using Third-Party CCleaner Removal Tools
Manually removing CCleaner can be painstakingly difficult for inexperienced users and time-consuming for those who know their way around macOS. Alternatively, you can save yourself the hassle by using automated CCleaner removal utilities that can be easily found on the Web and in the App Store. Whether you are having a problem uninstalling CCleaner completely, moving it to the trash, or errors prevent the removal, third-party apps should make things easier.
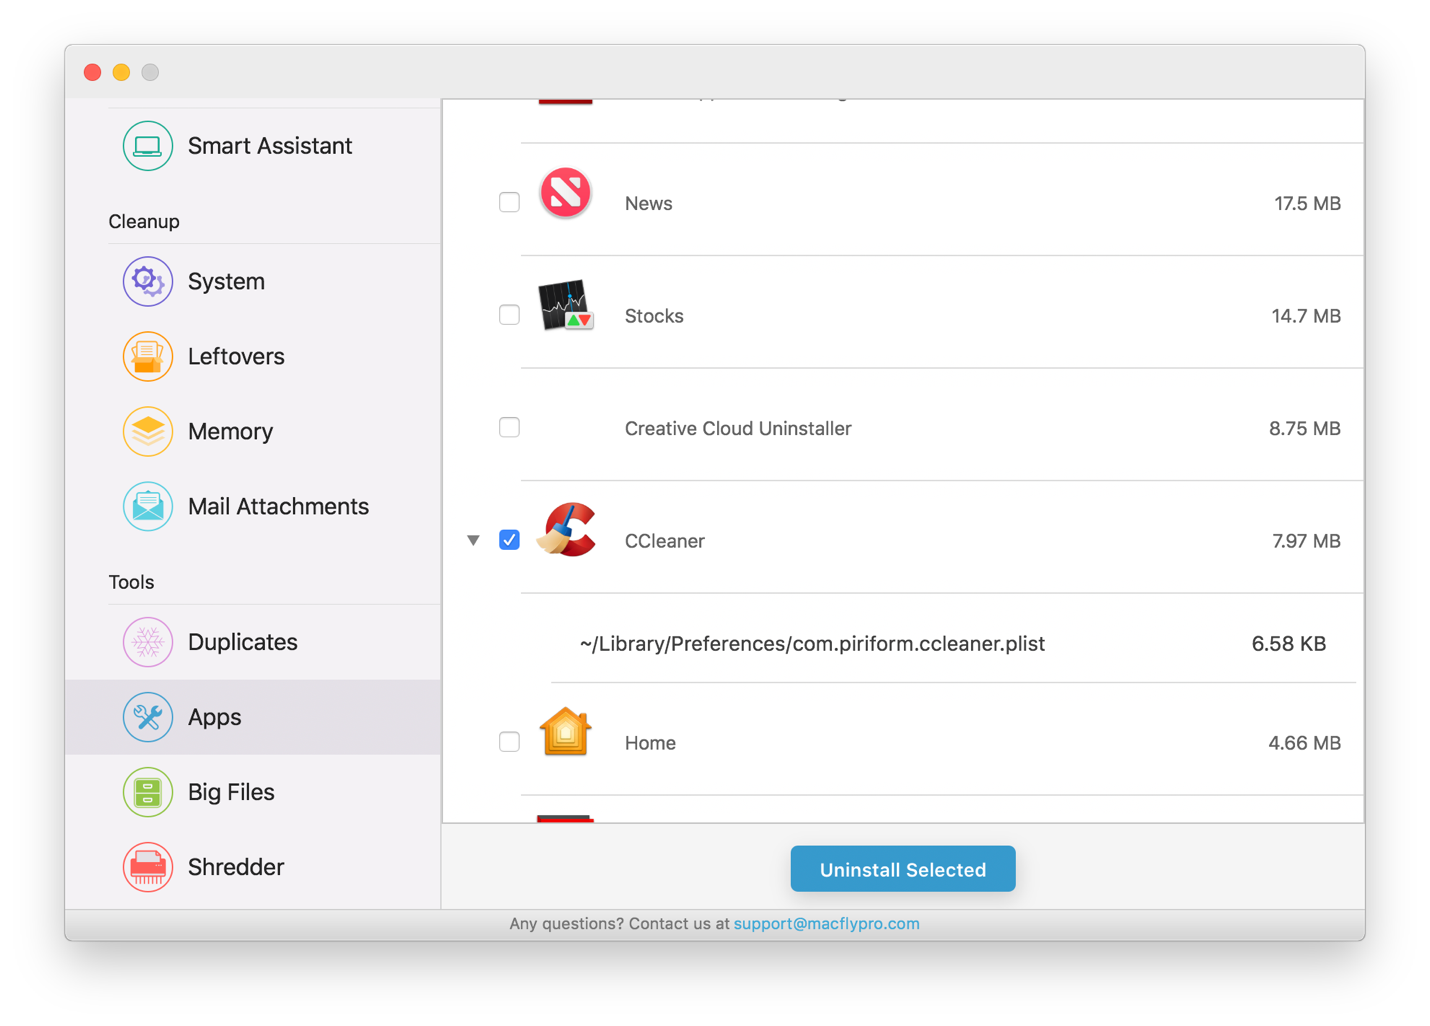
MacFly Pro is a great app to go for when considering a powerful removal tool. Apart from removing CCleaner, you can effortlessly eliminate virtually any other incompatible and corrupted apps.
- Download and Install MacFly Pro.
- Go to Apps module and select the apps you want to remove.
- Click on Uninstall Selected.

On top of getting an advanced uninstaller, MacFly Pro delivers an extensive selection of other useful features such as system cleanup, duplicate finder, leftover remover, shredder, etc. The arsenal of tools provided by MacFly Pro makes it an excellent substitute for CCleaner offering even more utilities than you would expect.
Conclusion
The vast majority of Mac users run into issues when using the manual method of uninstalling applications on Mac OS X. Sometimes, even failure to uninstall, incomplete removal or error messages may occur. Also, remnants of files on your Mac diminish free space on the hard drive. Using an automated tool to uninstall apps (and CCleaner in particular) turns out to be a lot more efficient in terms of saving time and effort.

